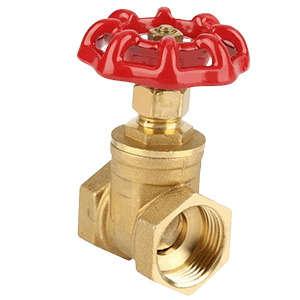
Installing a brass gate valve correctly is essential to ensure smooth operation, leak-free performance, and long service life. Although brass gate valves are widely used in plumbing, HVAC, and low-pressure industrial systems, improper installation can lead to leakage, stem damage, or premature failure. This guide walks you through best practices to help you get it right the first time.
Why Proper Installation Matters
A brass gate valve is designed mainly for on–off service, not throttling. Correct installation ensures:
-
①Reliable shut-off performance
-
②Minimal pressure loss
-
③Protection of valve seats and stem
-
④Compliance with system safety requirements
Step 1: Verify Valve Specifications Before Installation
Before installation, confirm that the brass gate valve matches your system requirements:
-
①Pressure rating (PN / Class)
-
②Temperature range
-
③Thread type (NPT, BSP, BSPT, etc.)
-
④Medium compatibility (water, air, oil)
Also check that the valve body, threads, and stem are free from cracks, dents, or debris.
Step 2: Prepare the Pipeline Properly
-
①Flush the pipeline to remove dirt, welding slag, or metal particles
-
②Ensure pipe threads are clean and undamaged
-
③Align the pipeline correctly to avoid stress on the valve body
Misalignment can cause thread damage or internal leakage after installation.
Step 3: Check Valve Position Before Mounting
Always install the brass gate valve in the fully open position.This protects the gate and seat surfaces from damage during tightening and prevents excessive stress on internal components.
Step 4: Apply Thread Sealant Correctly
-
①Use PTFE tape or approved pipe thread sealant
-
②Apply sealant evenly, following the thread direction
-
③Avoid excess sealant that could enter the valve cavity
Never apply sealant to the valve threads themselves if the manufacturer advises otherwise.
Step 5: Install the Valve Without Over-Tightening
Carefully screw the valve onto the pipe by hand first. Then use a wrench:
-
Tighten on the hex or body section, not the stem or handwheel
-
Avoid excessive force, which can crack the brass body
Brass is strong but softer than steel—over-tightening is a common installation mistake.
Step 6: Observe Correct Flow Orientation (If Required)
Most brass gate valves are bi-directional, but some designs may indicate preferred flow direction. Always check markings or manufacturer instructions to ensure optimal performance.
Step 7: Support the Pipeline
-
Use proper pipe supports or brackets
-
Prevent vibration and mechanical stress
This is especially important in vertical installations.
Step 8: Pressure Test After Installation
-
①Slowly pressurize the system
-
②Check all joints for leakage
-
③Fully open and close the valve to confirm smooth operation
If leakage occurs, depressurize the system before making adjustments.
Common Installation Mistakes to Avoid
-
①Using a gate valve for flow throttling
-
②Installing the valve in a partially closed position
-
③Applying excessive torque
-
④Ignoring thread standards mismatch
-
⑤Allowing pipeline misalignment
Avoiding these errors significantly extends valve service life.
Post time: Jan-27-2026