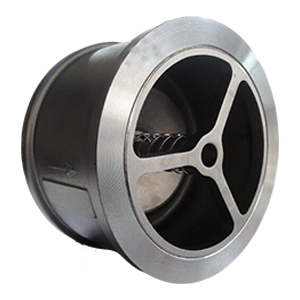
A disc check valve (also called a non-return valve or silent check valve) is designed to allow fluid to flow in one direction and prevent backflow. These valves are commonly used in marine systems, HVAC pipelines, steam lines, and water treatment plants. Over time, wear and tear can affect performance—requiring a disc check valve replacement.Here’s a detailed, professional guide to help you safely and effectively replace your disc check valve.
Tools and Materials Needed
-
①New disc check valve (ensure size, material, and pressure class match)
-
②Pipe wrench or spanner
-
③Pipe sealant or PTFE tape (if required)
-
④Cleaning brush or rag
-
⑤Torque wrench (recommended)
-
⑥Gasket (if flanged connection)
-
⑦Safety gloves and goggles
Safety First
-
①Shut down the system and depressurize the pipeline.
-
②Allow the system to cool (especially for steam or hot water lines).
-
③Confirm that no back pressure or liquid remains in the line.
Step-by-Step: How to Replace a Disc Check Valve
1. Locate the Valve
Identify the installation location of the disc check valve in your system. These valves are often installed between flanges (wafer type) or inside threaded pipe sections.
2. Remove the Old Valve
For Wafer-Type Disc Check Valves (flanged system):
-
①Loosen and remove the flange bolts or studs.
-
②Carefully slide the valve out from between the flanges.
-
③Remove any old gasket material or debris from the flange faces.
For Threaded-Type Check Valves:
-
①Use two wrenches—one to hold the fixed pipe, the other to unscrew the valve.
-
②Rotate counterclockwise to remove.
-
③Clean threads thoroughly.
3. Inspect the System
-
①Check both flange faces or pipe threads for damage or corrosion.
-
②Clean all sealing surfaces.
-
③Ensure pipe alignment is correct to avoid stress on the new valve.
4. Install the New Disc Check Valve
For Wafer Type:
-
①Place new gaskets (if required) on each flange face.
-
②Insert the new disc check valve, aligning it with the flow direction arrow.
-
③Reinstall the flange bolts evenly using a cross-pattern.
-
④Tighten to the manufacturer’s torque specifications.
For Threaded Type:
-
①Wrap male threads with PTFE tape (or apply sealant).
-
②Screw in the new valve in the correct flow direction.
-
③Hand-tighten, then use a wrench to secure (avoid over-tightening).
5. Test the System
-
①Slowly pressurize the system while checking for leaks.
-
②Observe valve operation—ensure it allows forward flow and prevents reverse flow.
-
③Monitor for unusual noises or vibration that could indicate misalignment.
When Should You Replace a Disc Check Valve
-
①Backflow is occurring in the system
-
②The disc is stuck open or closed
-
③Noise or water hammer during shutdown
-
④Visible corrosion, cracks, or deformation
-
⑤The valve has reached the end of its service life
I-FLOW Disc Check Valves
At Qingdao I-FLOW, we manufacture and supply high-quality disc check valves made from:
-
Stainless Steel, Bronze, Cast Iron, and Brass
-
Suitable for marine, oil & gas, steam, and HVAC applications
-
Certified by DNV, ABS, CCS, ISO 9001
Post time: Jul-09-2025