Installing a balancing valve may look simple, but doing it correctly is essential for getting accurate flow control, stable system performance, and long-term energy savings. Whether you’re working on HVAC systems, chilled water networks, heating loops, or industrial pipelines, proper installation ensures that the valve performs exactly as designed.
1. Install the Valve in the Correct Flow Direction
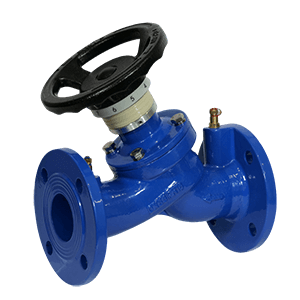
Balancing valves—especially static balancing valves—are designed with a specific flow direction.
Most valves include:A flow arrow on the body.An inlet and outlet marking
Installing the valve backward can cause poor regulation accuracy, increased noise, and unstable system pressure. Always double-check the markings before installation.
2. Leave Enough Straight Pipe Length
To ensure accurate measurement and avoid turbulence:Keep at least 5 pipe diameters of straight pipe upstream.Keep 2–3 pipe diameters of straight pipe downstream
This stabilizes flow entering the valve, helping technicians take valid readings during commissioning.
3. Ensure Correct Valve Position (Horizontal or Vertical)
Many balancing valves can be installed in either horizontal or vertical piping, but the orientation of the measuring ports must remain accessible.
Best practice:Install the test ports facing upward or sideways, not downward.Avoid placing the valve where water or debris can accumulate on the ports.
4. Keep Measuring Ports Accessible
Engineers and commissioning teams need to use:Manometers.Flow meters.Differential pressure measurement tools
Place the valve where these tools can be connected easily. Avoid tight corners, ceilings, or locations with no maintenance access.
5. Clean the Pipeline Before Installation
Balancing valves can be sensitive to debris.
Before installation:.Flush the pipe.Remove welding slag, rust, and other particles.Install strainers where necessary
This protects the valve seat and ensures stable flow readings later.
6. Avoid Installing Near Pumps, Tees, or Sharp Bends
Turbulence caused by pumps or pipe fittings affects the accuracy of differential pressure readings.
Try to avoid placing balancing valves:Immediately after a pump.Right next to an elbow or tee.Near a control valve or shut-off valve
Give the flow time to stabilize before reaching the balancing valve.
7. Use the Right Type of Balancing Valve for the System
①Static balancing valves
-
Best for systems with stable differential pressure
-
Common in heating circuits and fixed-flow branches
②Pressure Independent Control Valves (PICVs)
-
Automatically maintain flow despite pressure fluctuations
-
Suitable for chilled/hot water systems, modern HVAC, and variable flow networks
8. Perform Accurate Commissioning
After installation, technicians need to:
-
①Measure differential pressure
-
②Adjust the preset value
-
③Verify the actual flow rate
-
④Document final settings
Commissioning is as important as installation—without correct adjustment, the balancing valve cannot perform its job.
9. Consider Future Maintenance Needs
When choosing installation locations:
-
①Leave space for valve removal
-
②Keep isolation valves upstream and downstream
-
③Ensure test ports remain easy to access
Good planning reduces downtime and maintenance costs in the long run.
Post time: Dec-05-2025